Invest & Enjoy: Savvy Home Upgrades to Tackle Now with Your Future in Mind

Invest & Enjoy: Savvy Home Upgrades to Tackle Now with Your Future in Mind

More and more clients are coming to me for assistance with modest projects that will make their current house a better fit for their needs while also representing smart investments -- reaping benefits in potential sales price gains when they sell, enhancing rentability if they hold onto as an investment, or transferring to their new home when they move. Here are four ways you can make the most of today strategically…

Gird Your Loins! Getting Your Home Ready for Winter

With the first hard freeze in the DC area expected this weekend, I think we can officially say we're in fall and on our way to winter. In addition to all the fun seasonal decor inside and outside (future blog post, I promise), there are lots of things you should do to prepare your home - whether a condo, townhouse or detached home - for the colder months. 

Source: Wikimedia

Source: Wikimedia

Here are a few tips (although there are many more) which are hopefully helpful to newer homeowners (congrats!) and veterans alike:

  1. Have your HVAC serviced and replace your filter(s). Many service providers offer maintenance plans, as well, that can save you money on regular maintenance and even put you in a priority position should you have an issue and need service quickly to restore heat.

  2. On a windy day, close your windows and inspect them for air leaks. Windows - both the type and the quality of the seal - can make a huge difference in how your home retains heat. Seal any gaps and, if you have been thinking about upgrading to more energy efficient windows or installing storm windows (or doors), you may still have time if you hurry.

  3. Install weather stripping on the sides or bottoms of any leaky doors. Just like windows, doors can make a huge difference in your energy efficiency. Weather stripping is an easy and inexpensive project for any homeowner...regardless of experience level.

  4. Winterize your water lines. Water and the cold can spell bad news, so make sure any garden hoses are drained and stowed away neatly. And don't forget to turn off exterior water spigots. Once you've turned off the valve, you'll also want to go outside and turn on the exterior spigot until the water stops flowing.

  5. Insulate any exposed pipes. If you have any plumbing that is exposed to the elements, take time to insulate them and minimize the chance that they freeze or burst, leading to dreaded and costly water damage.

  6. Inspect your roof and replace any damaged or missing roof shingles. The rain, ice and snow can be brutal on your roof, so take time now to ensure it's ready to handle what mother nature may dish out.

  7. Make sure gutters and downspouts are free of leaves and debris. You may have to hold off on this, since we're still losing leaves, but it's a right of fall!

  8. Consider adding a fresh coat of paint or sealer on your deck. The winter is tough on us and our houses, so consider adding a new layer of protection to your beloved deck.

  9. Tend to your fireplace and chimney. If you are lucky enough to have a working fireplace (wood-burning or gas), make sure to have it serviced by a professional so it's ready for winter enjoyment (and Santa, too).

  10. Have your list of trusted service providers (and backups) ready. Even with preventative steps and maintenance, you may still run into an issue. Be prepared by gathering the contact information for HVAC, plumbing, roofing and other services professionals in one place (on paper or digitally). Also make sure to have more than one option for each, in case you need faster service and are dealing with a high-demand time.

Finally, if you need a recommendation for a local professional who can help you with any of your home needs, please don't hesitate to reach out! 

Amber Harris is the owner of At Home DC and a licensed real estate agent with Keller Williams Capital Properties working with clients in DC, Maryland and Virginia. 

Simplify for Spring: Tricks to Gain Control of Your Space & Stuff

With spring officially here, we find ourselves spending more time outdoors (rightfully so) but there's always that unspoken obligation to "spring clean." While I'm no Marie Kondo and there are seemingly unlimited books and articles devoted to the topic, I thought I'd share a few tips that have served me well. These nuggets also are great if you are looking to get your property into shape before selling or paring down before making a move to (or starting the search for) a new home.

Closet Cleanup
I'm an unabashed clothes horse and, while I did install California Closets to help maximize my (in my opinion) limited space, there are a few rules I have in place to help out:

  • Slim Down: I can't say enough about leveraging slim-style hangers to maximize storage (and sleakness). I love these hangers from Bed, Bath & Beyond not only because they are slim but also because they have great rubber grips that work well in the closet and when hanging items to dry. While replacing all your hangers can seem excessive, it makes a huge difference (and you can donate the old hangers to a local charity).
  • To Every Season Turn, Turn, Turn: It's all to easy to talk yourself into keeping a dress or blouse that in reality you haven't worn in a few years. To help keep me honest, I turn the hangers on items I have worn. While it may look a little less neat than the alternative, this makes it easy to go through your closet at the end of a season and remove the pieces you haven't worn so you can donate or sell them. The feeling when you end up with a pile of empty hangers on your bed, a bag full of clothes to donate and a less crammed closet is among the best around. Seriously.

Shop Your Home
We've all done it. Seen a great deal on deodorant at the store or bought an item because we couldn't find it at home or thought we were out. If you are like me, you then end up with three half-used deodorants and multiples of too many products. To keep toiletry sprawl at bay:

  • Group Like Items: If we've learned anything from Kondo, it's all about pooling your stuff to really assess what you have. I do this with toiletries - from shampoos from hotels and free samples from Sephora to full-size items I have bought. Use easy-to-clean plastic bins to organize items by type (makeup and facial care, hair products, body products, etc.) under your sink or in your linen closet.
  • Check Before Buying: Before adding an item to your shopping list, check your stash to see if you have it - even if it's a travel size version. Use what you have at home and deplete your supply before buying more. I am currently working on a supply of body washes from travels that I will never get through otherwise. Not only does this help you save money but it will create space!

These are just a few ideas to get you going (and the toiletries tips also can apply to your pantry - and encourage you to find and/or create new recipes in the kitchen). With April 15 around the corner, take advantage of donating items to a local charity (and taking the write-off) or perhaps sell higher-value items by consigning with a local store, organizing a neighborhood yard sale (a great way to meet your neighbors, too) or scheduling a clothing/book/etc. swap with friends (with food and drink, naturally). 

So much in life is complicated, so why not simplify what you can? Happy decluttering!

Amber Harris is the owner of At Home DC, an interior decorator and a licensed real estate agent with Keller Williams Capital Properties working with clients in DC, Maryland and Virginia. 

Making a (Back)splash in the Kitchen

When I started my home search in Washington, DC almost four years ago, I - like all prospective buyers - had a long list of my must-haves, nice-to-haves and dealbreakers.

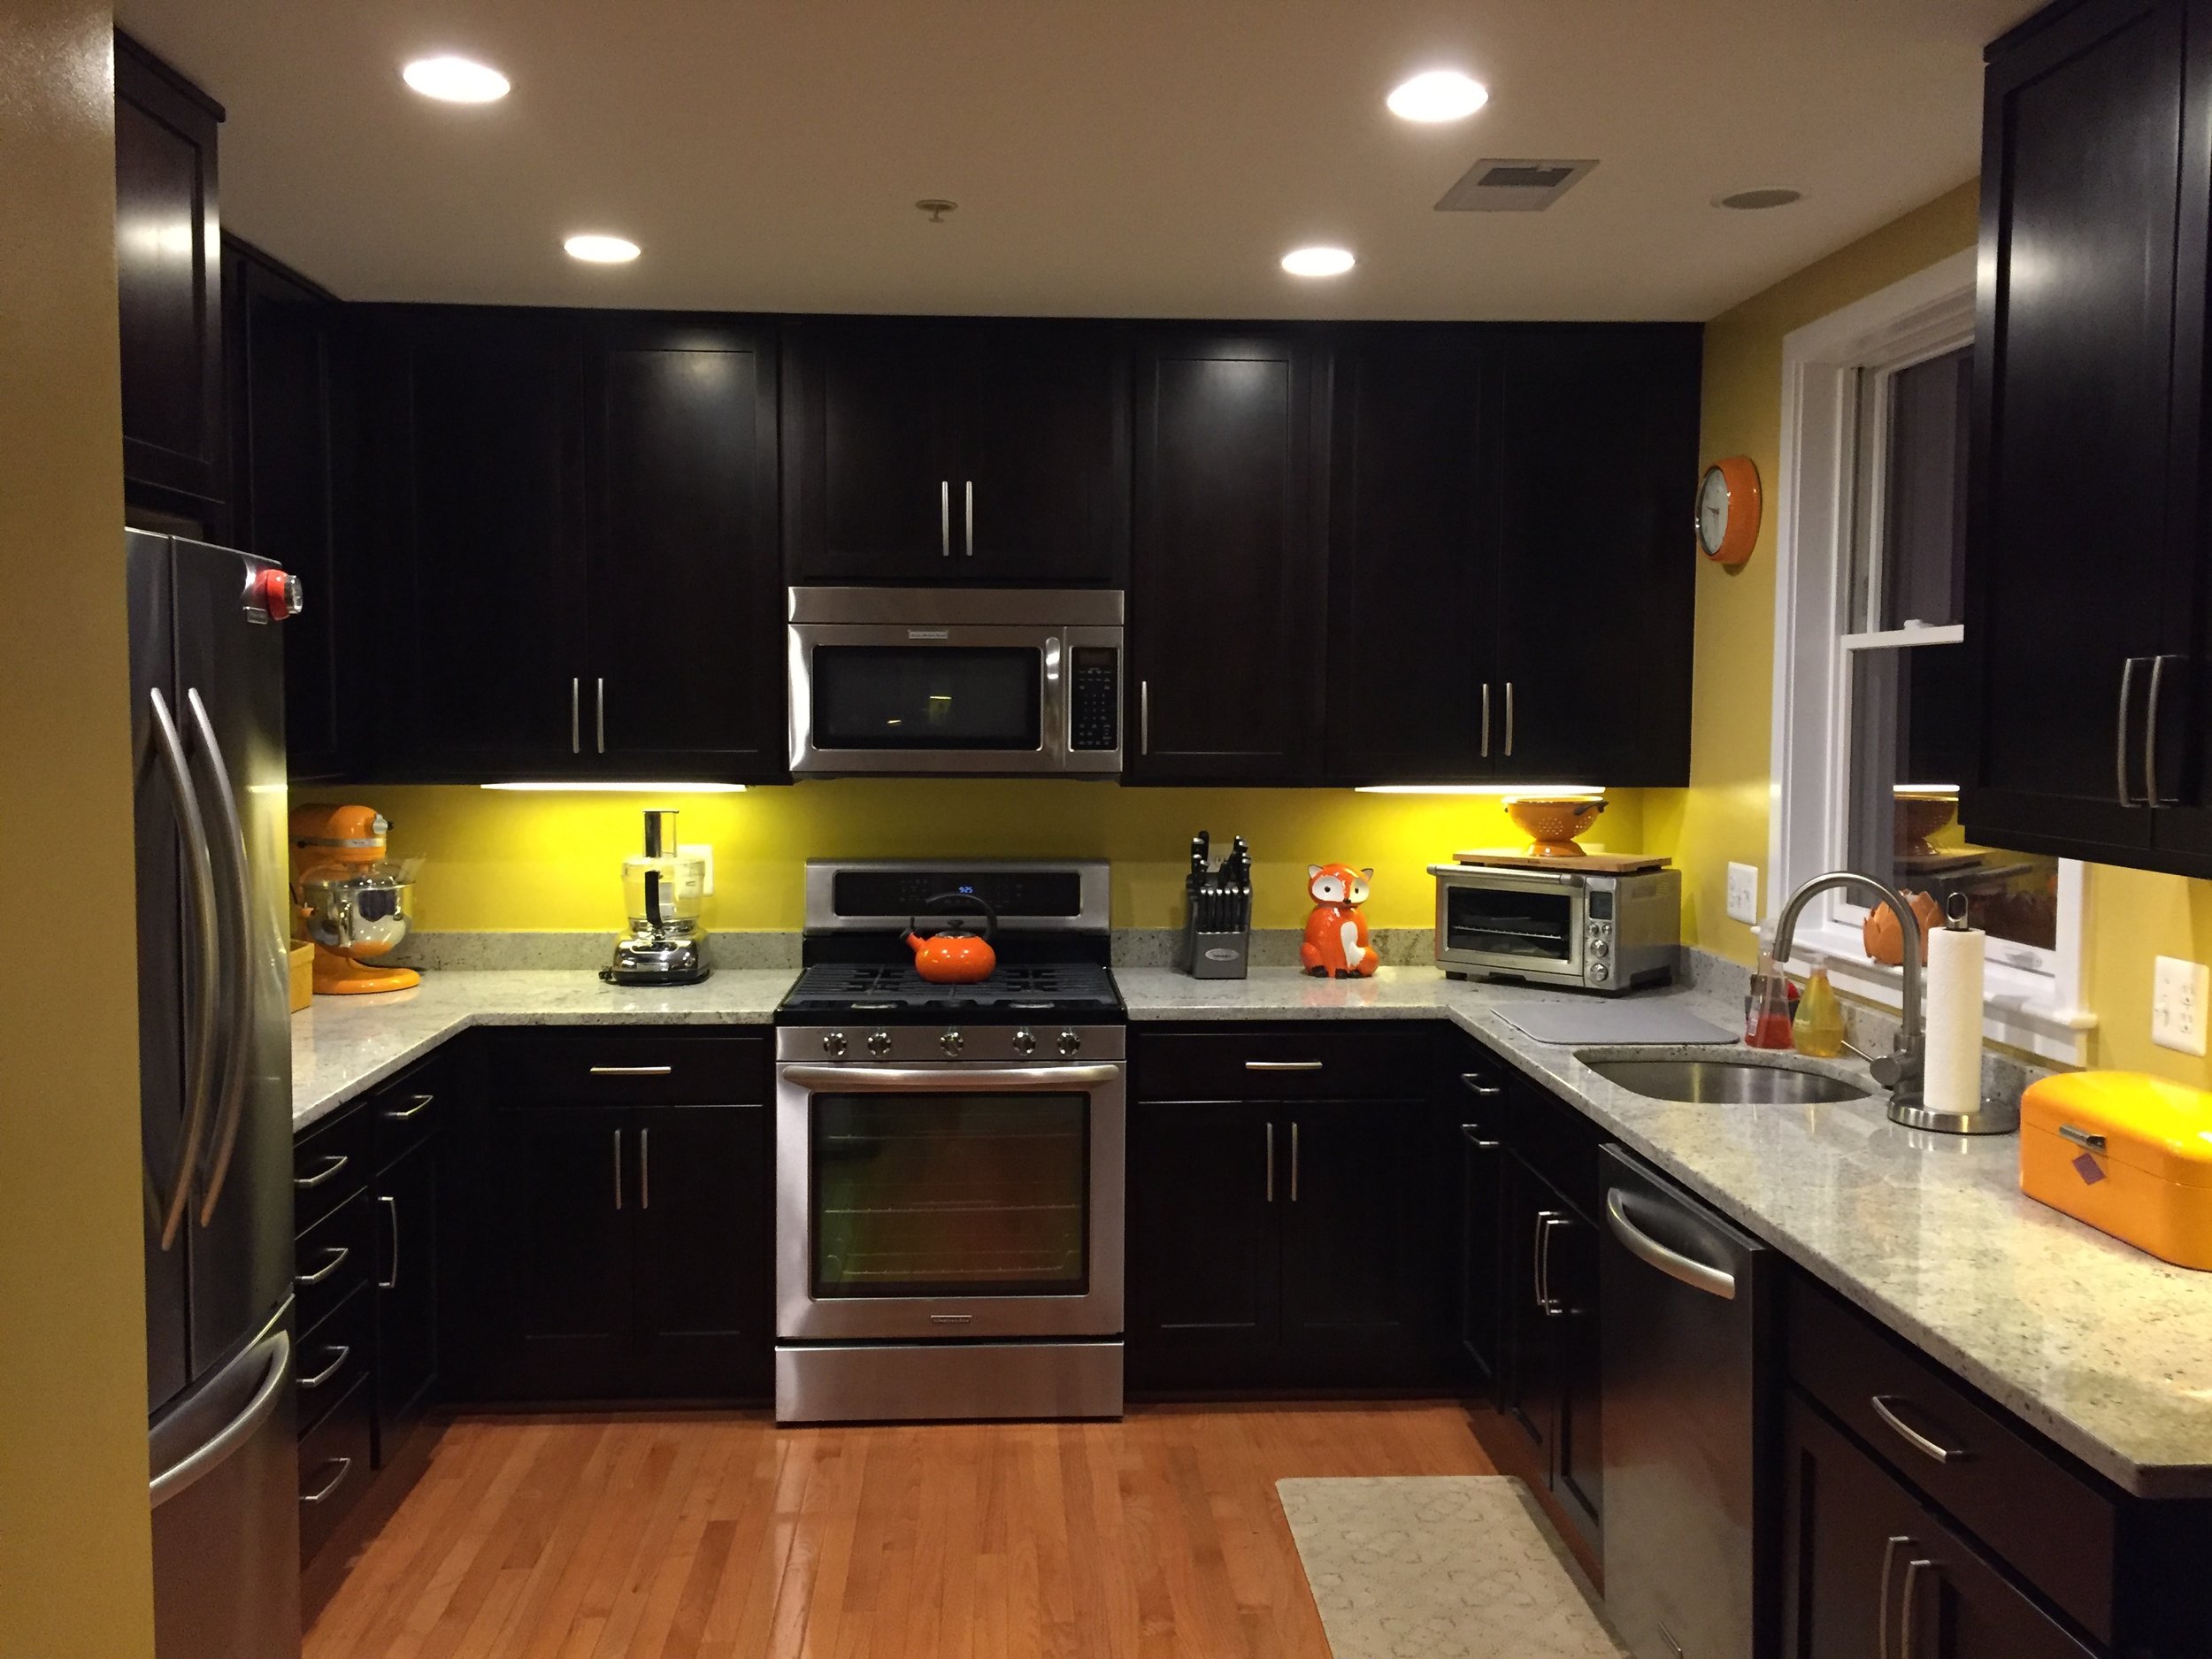
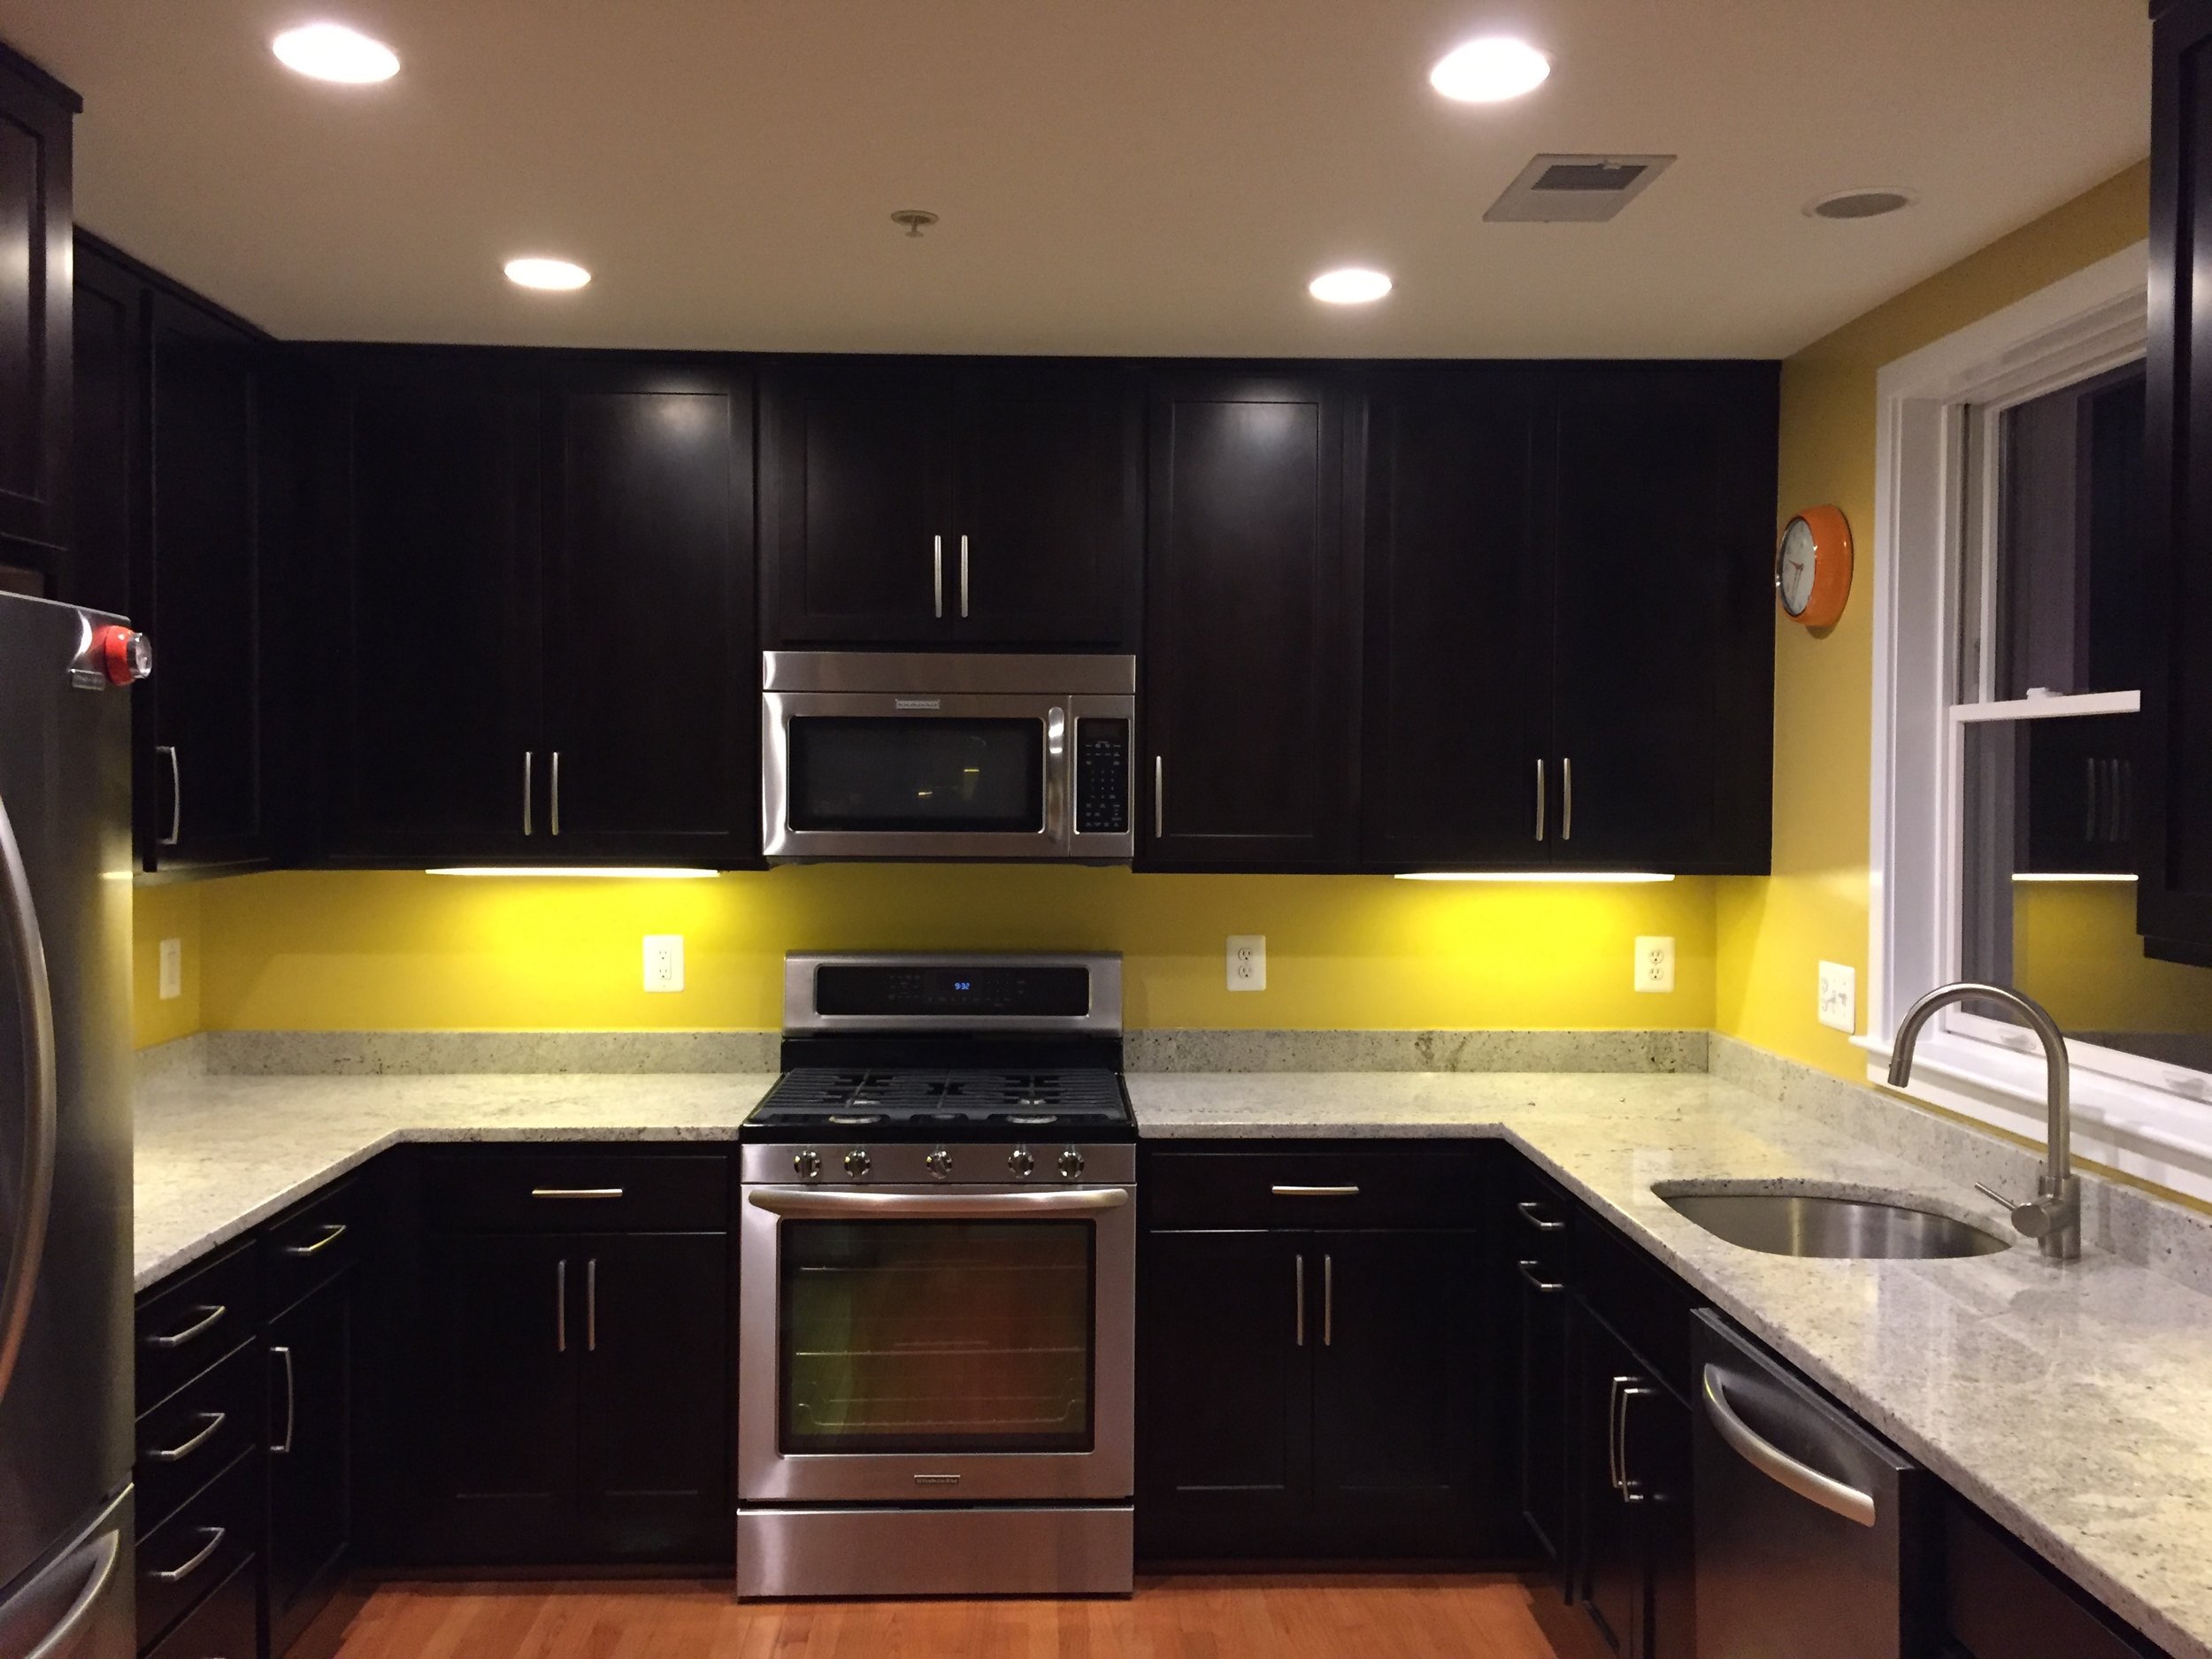
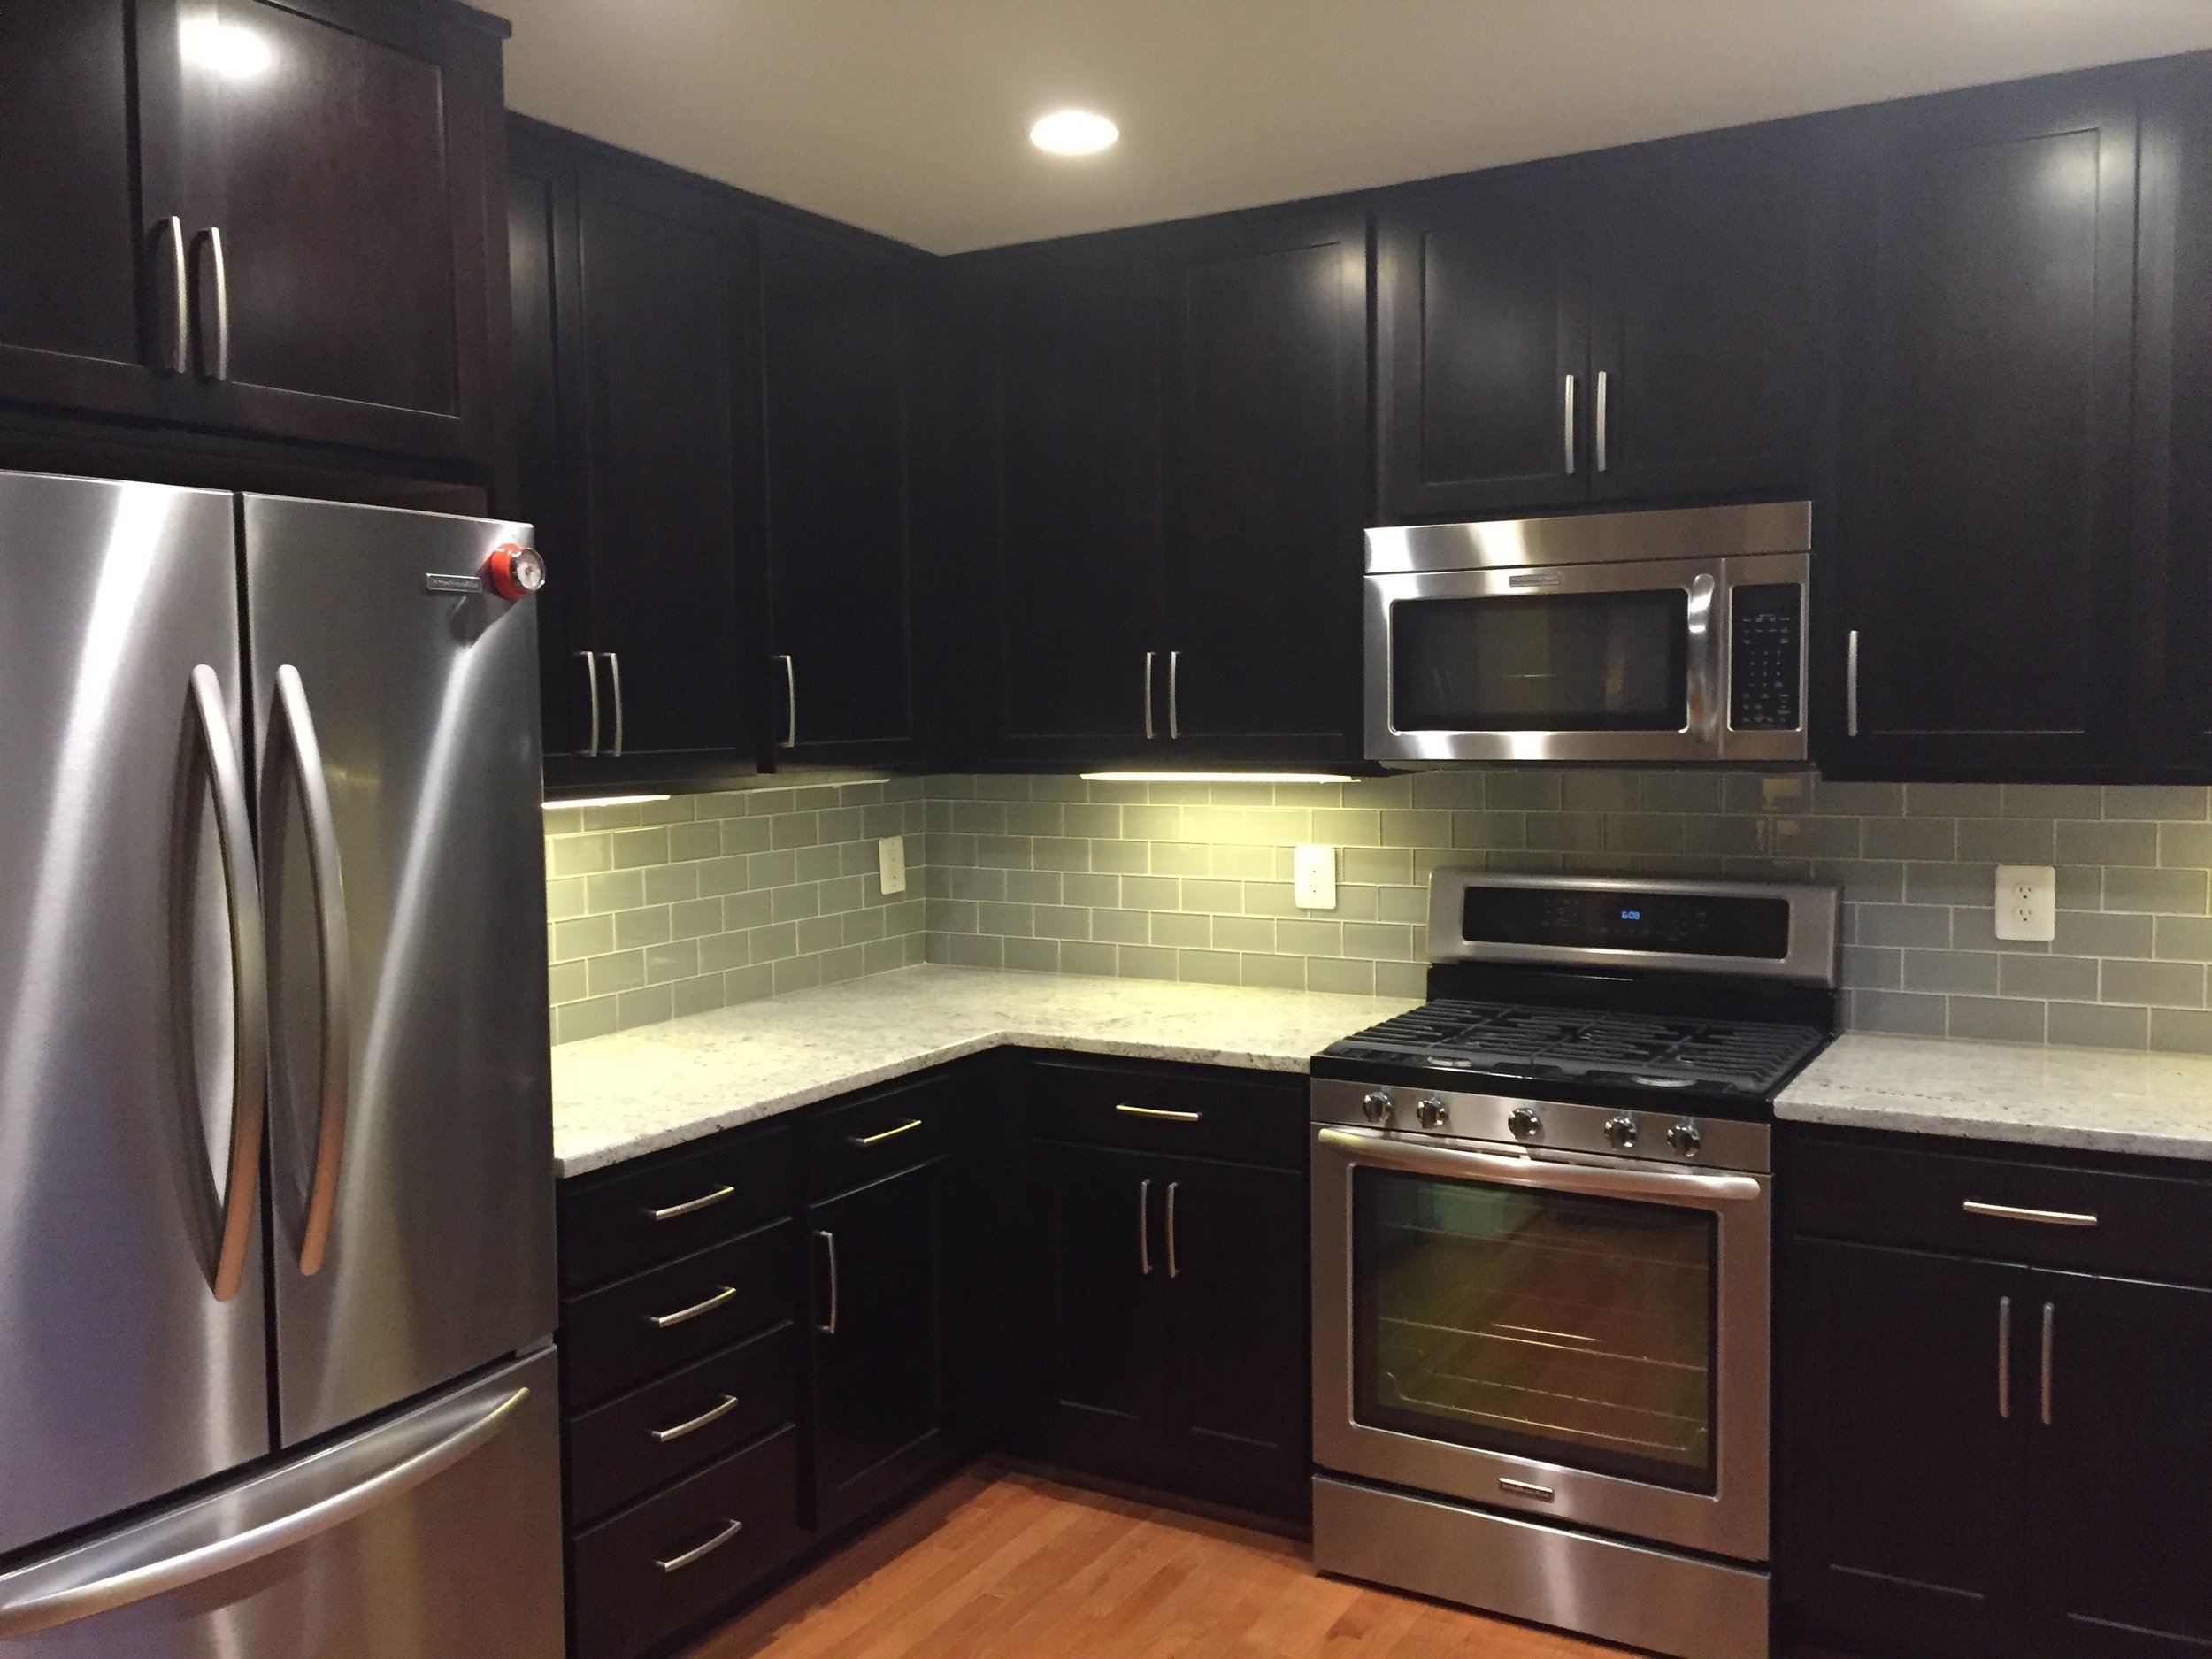
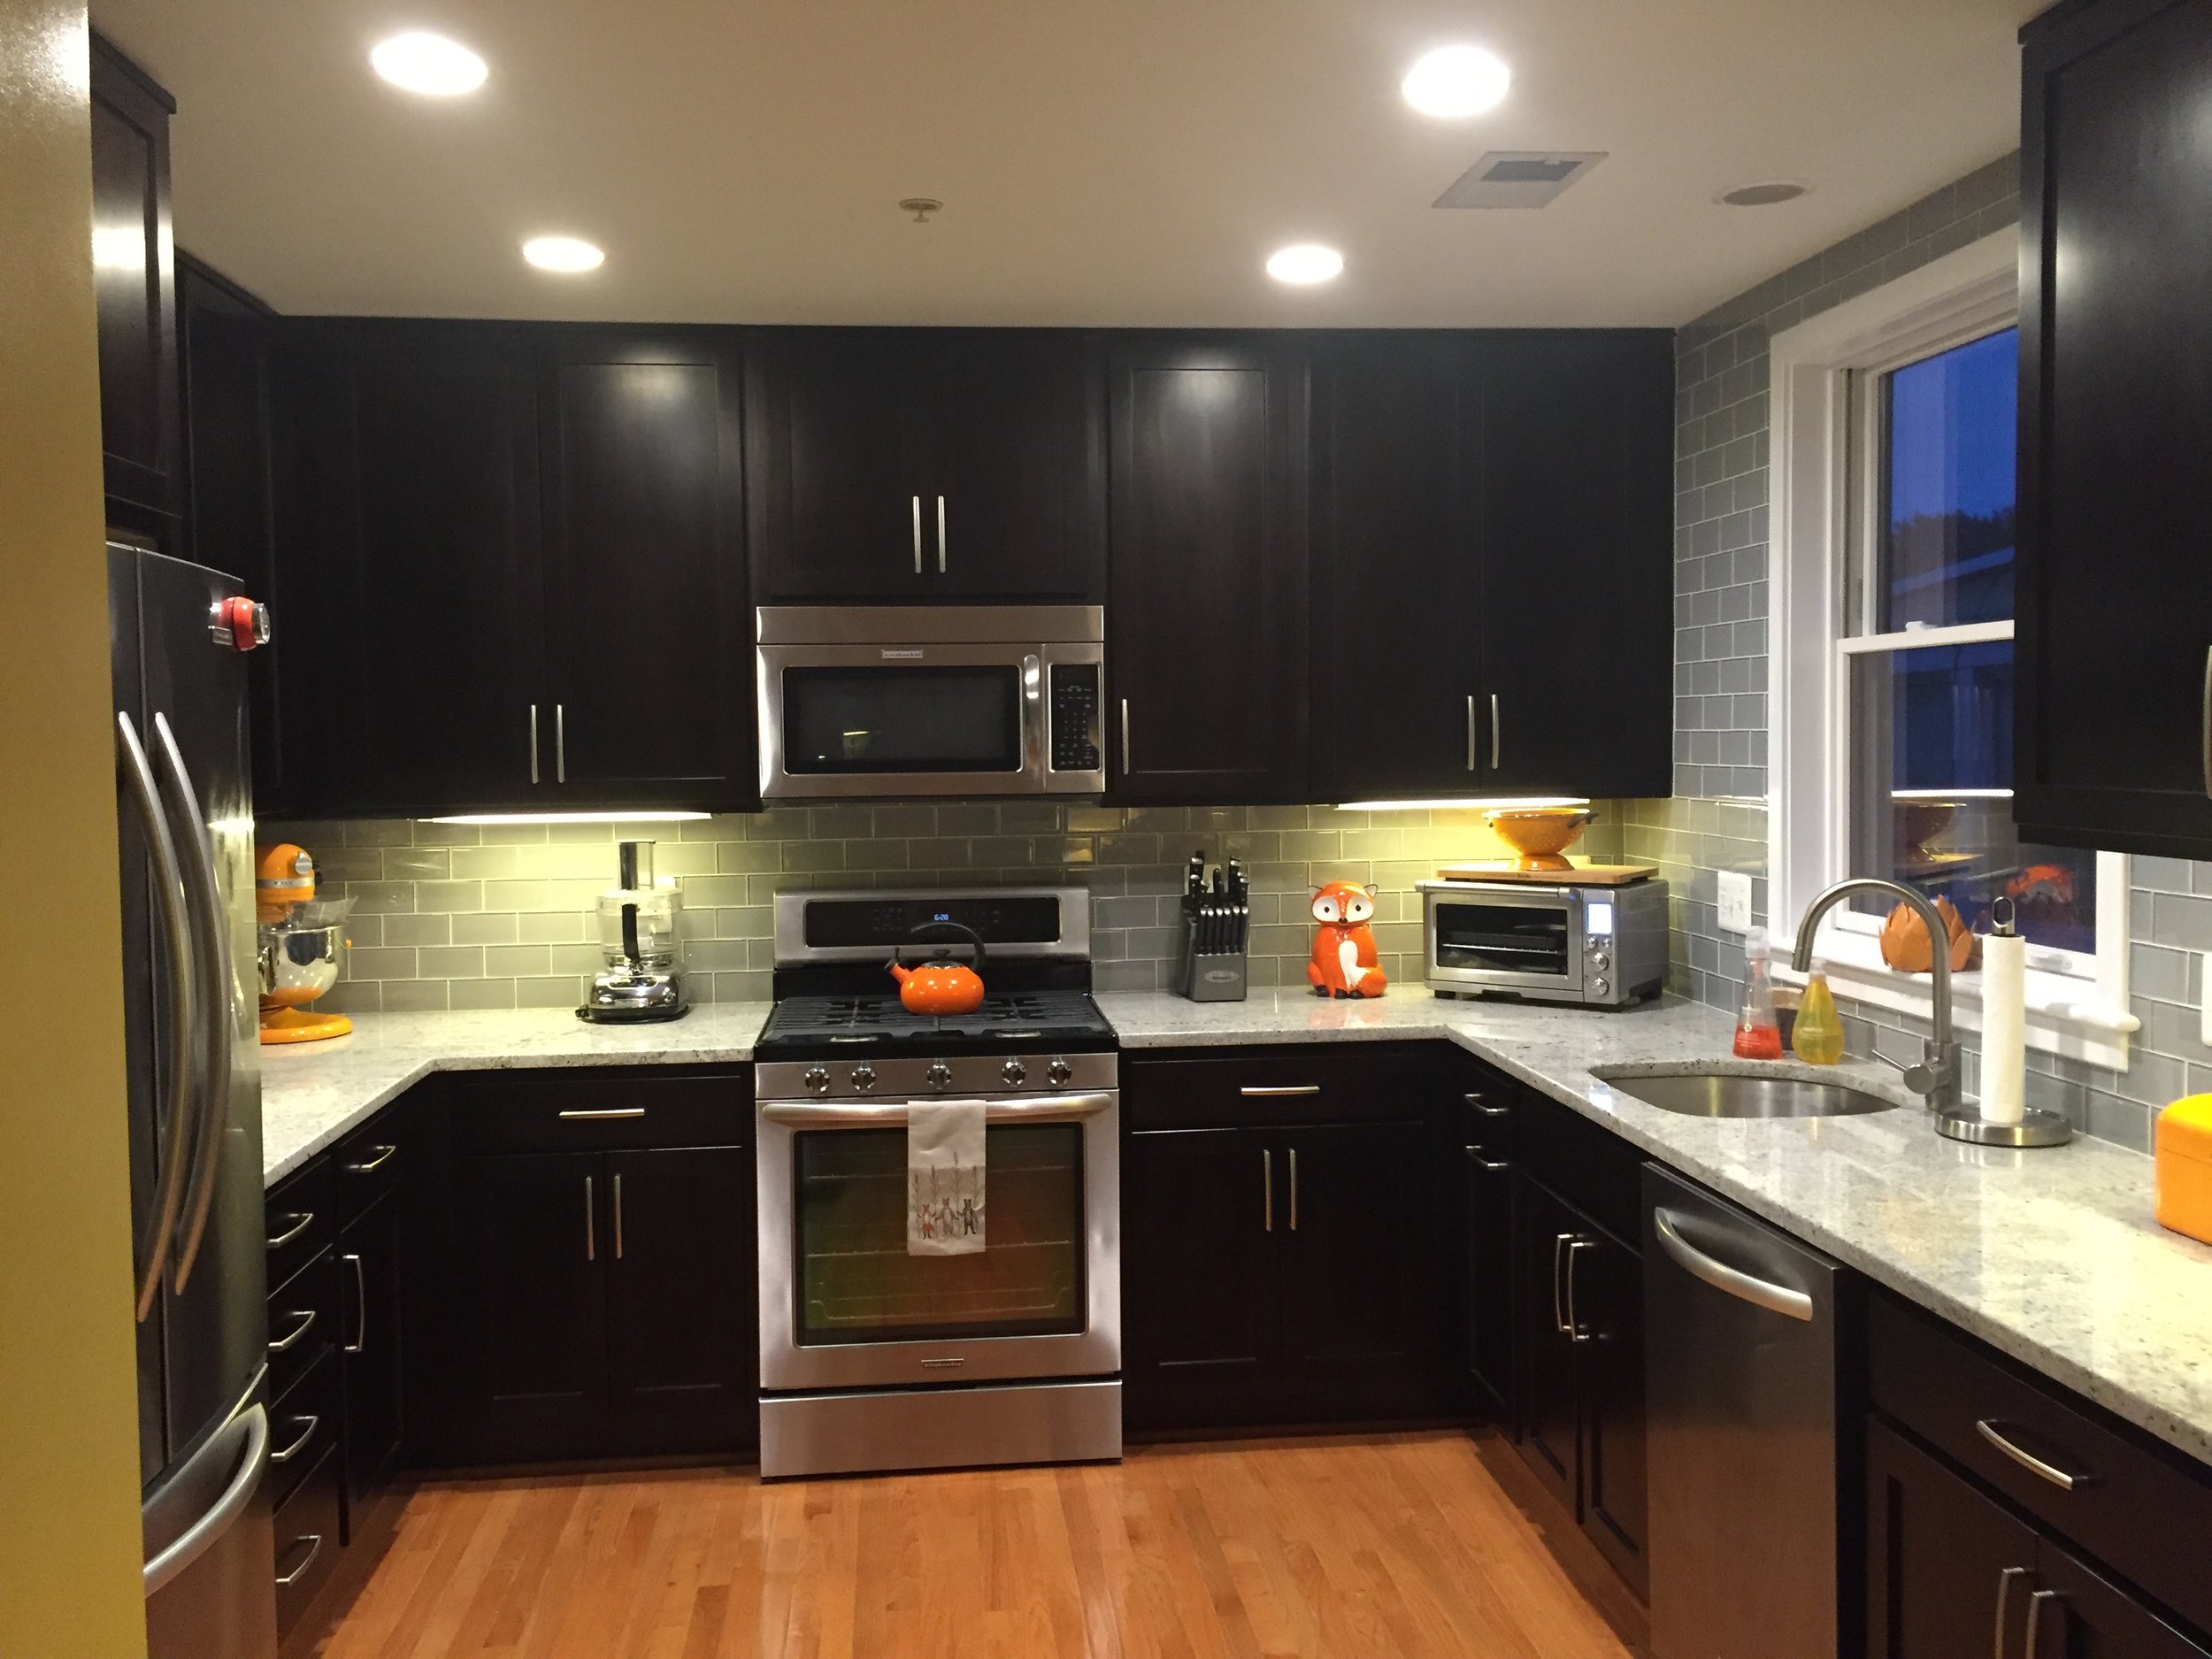
As someone who loves to entertain, the kitchen was a key area of focus, primarily when it came to function (hoping to upgrade from a small, enclosed kitchen), but with an eye on aesthetics. One of those design elements was a sleek backsplash.

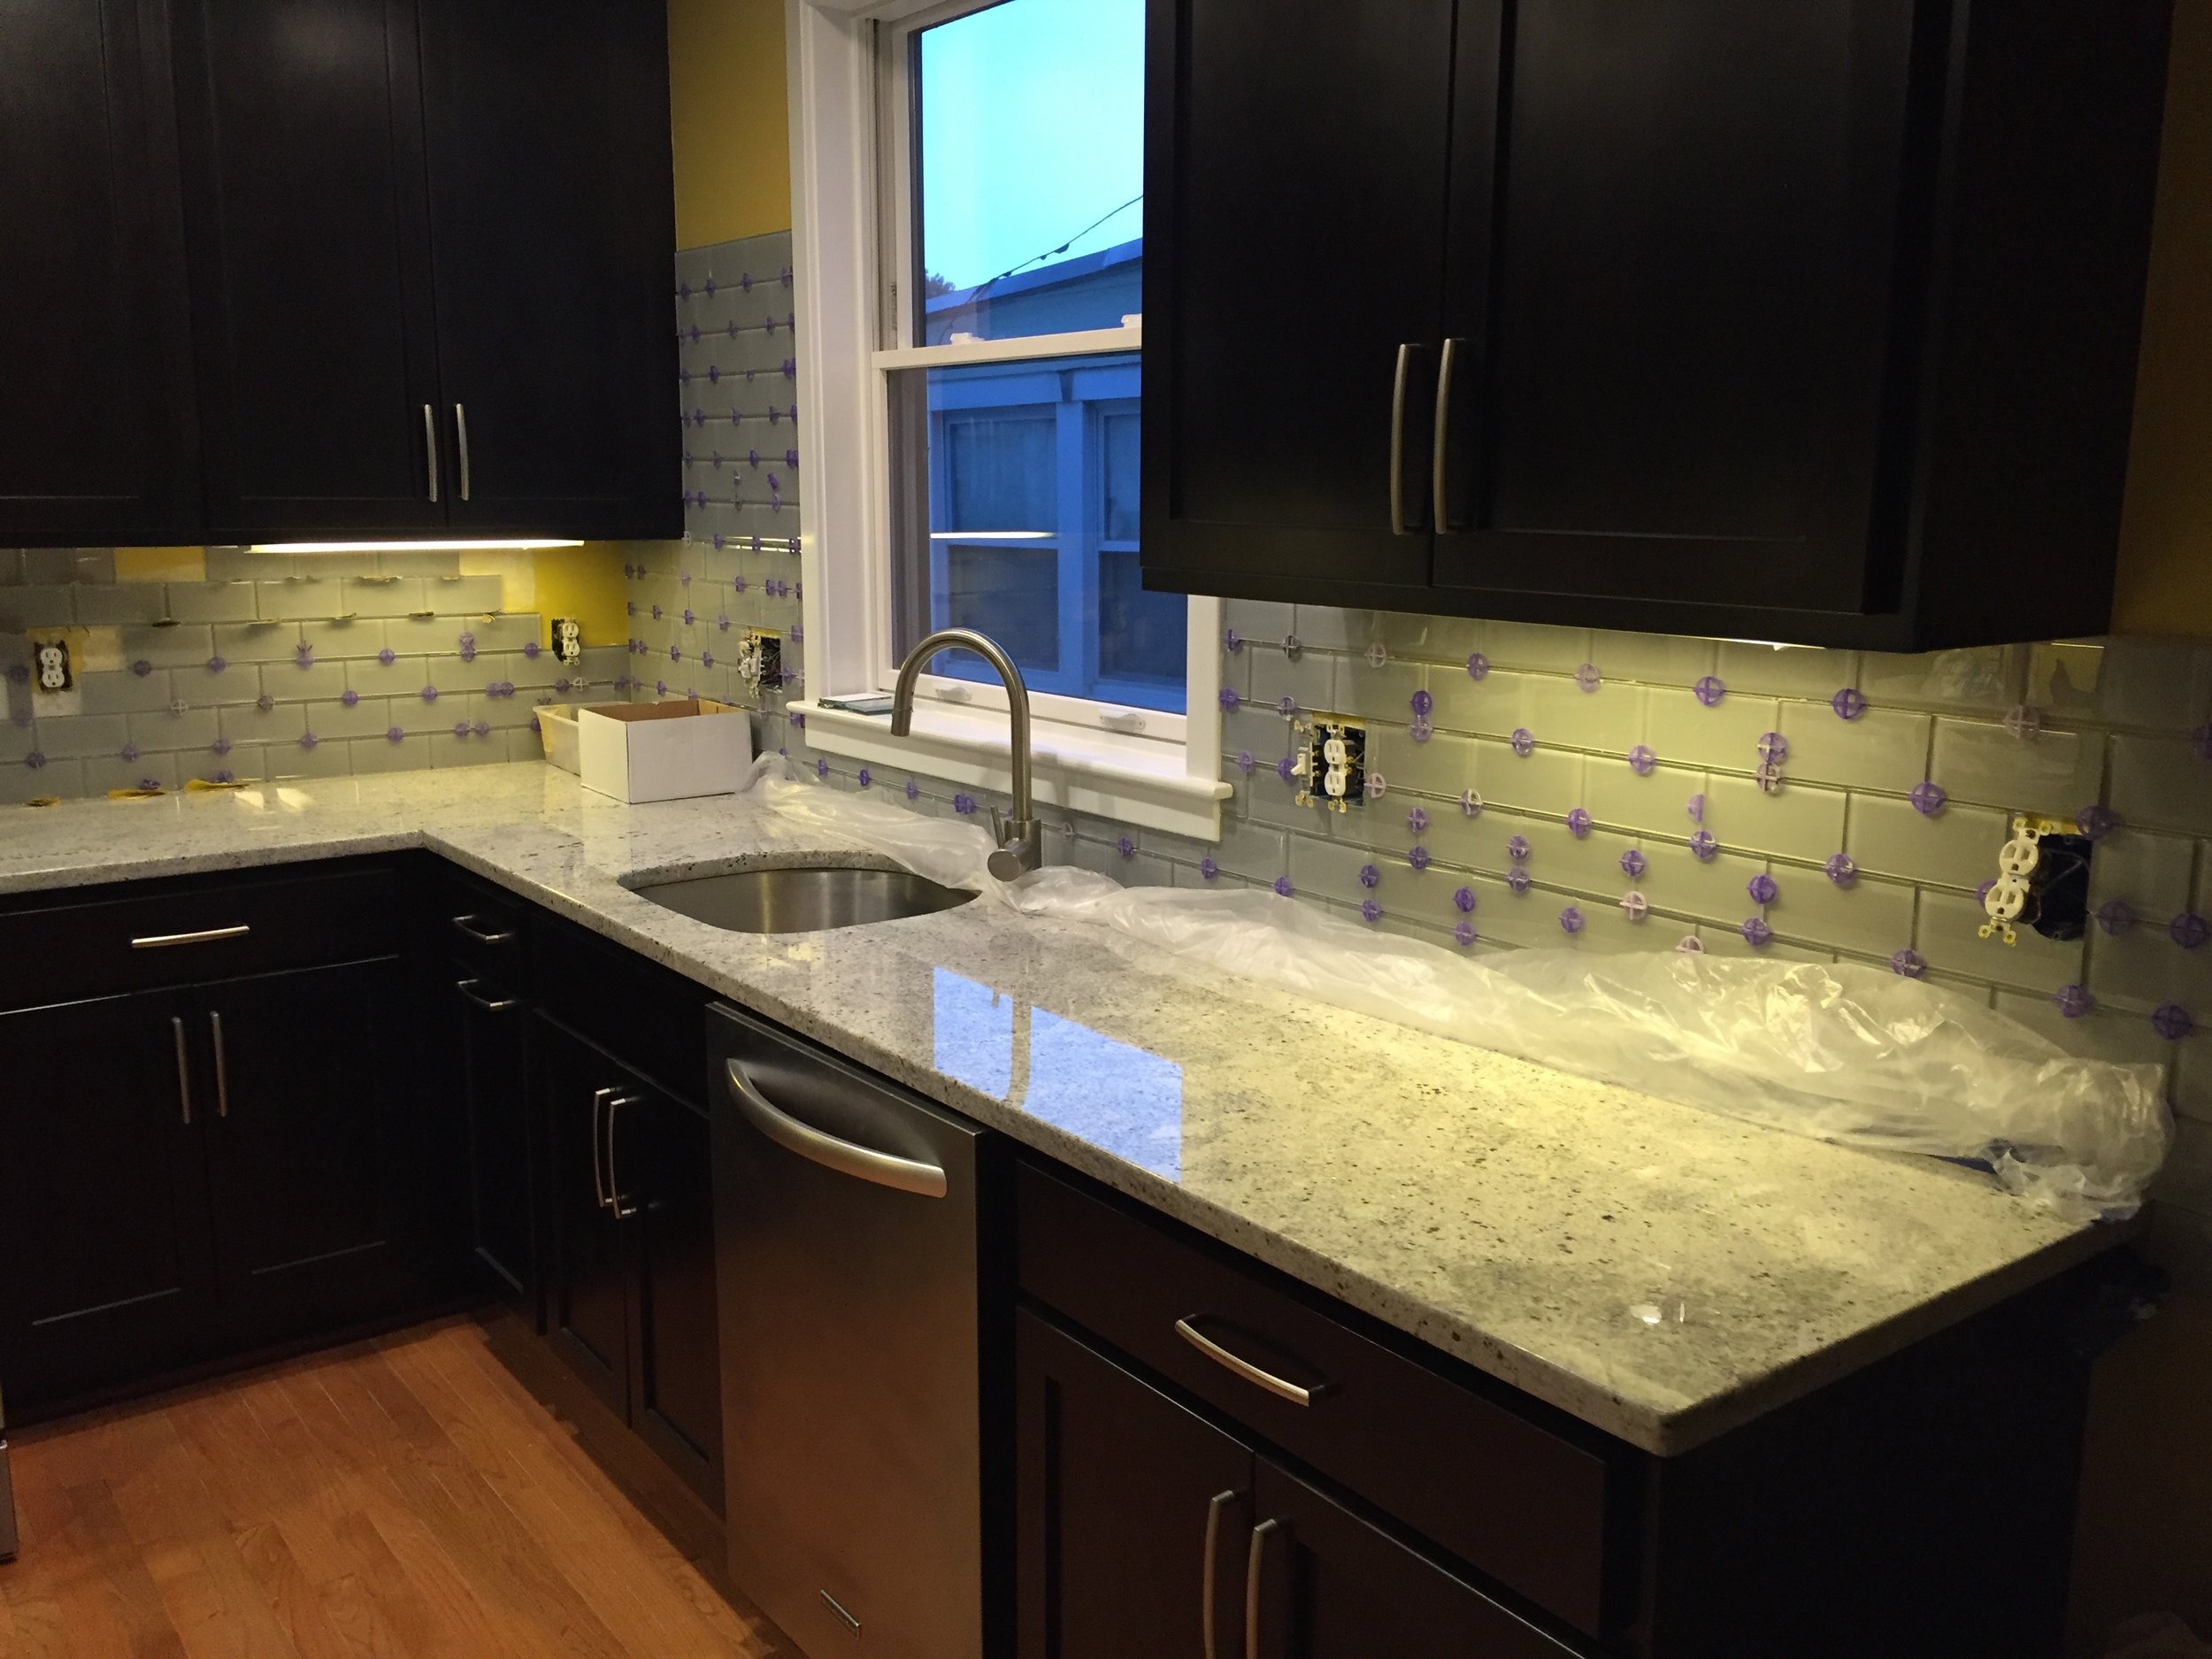
Touring dozens of homes, I saw a range of backsplashes (or lack of) - from simple 3-4" ones from the same material as the countertops to tiled, decorative backsplashes starting at the countertop (my preference). To make a long story short, the home that I ultimately bought had a 4" granite strip matching the counter. The easiest solution (and what I often see in updated kitchens on the market) is a decorative tile backsplash that starts above that slab. While I've encountered some of these that look decent, I personally still find most iterations like nails on a chalkboard.

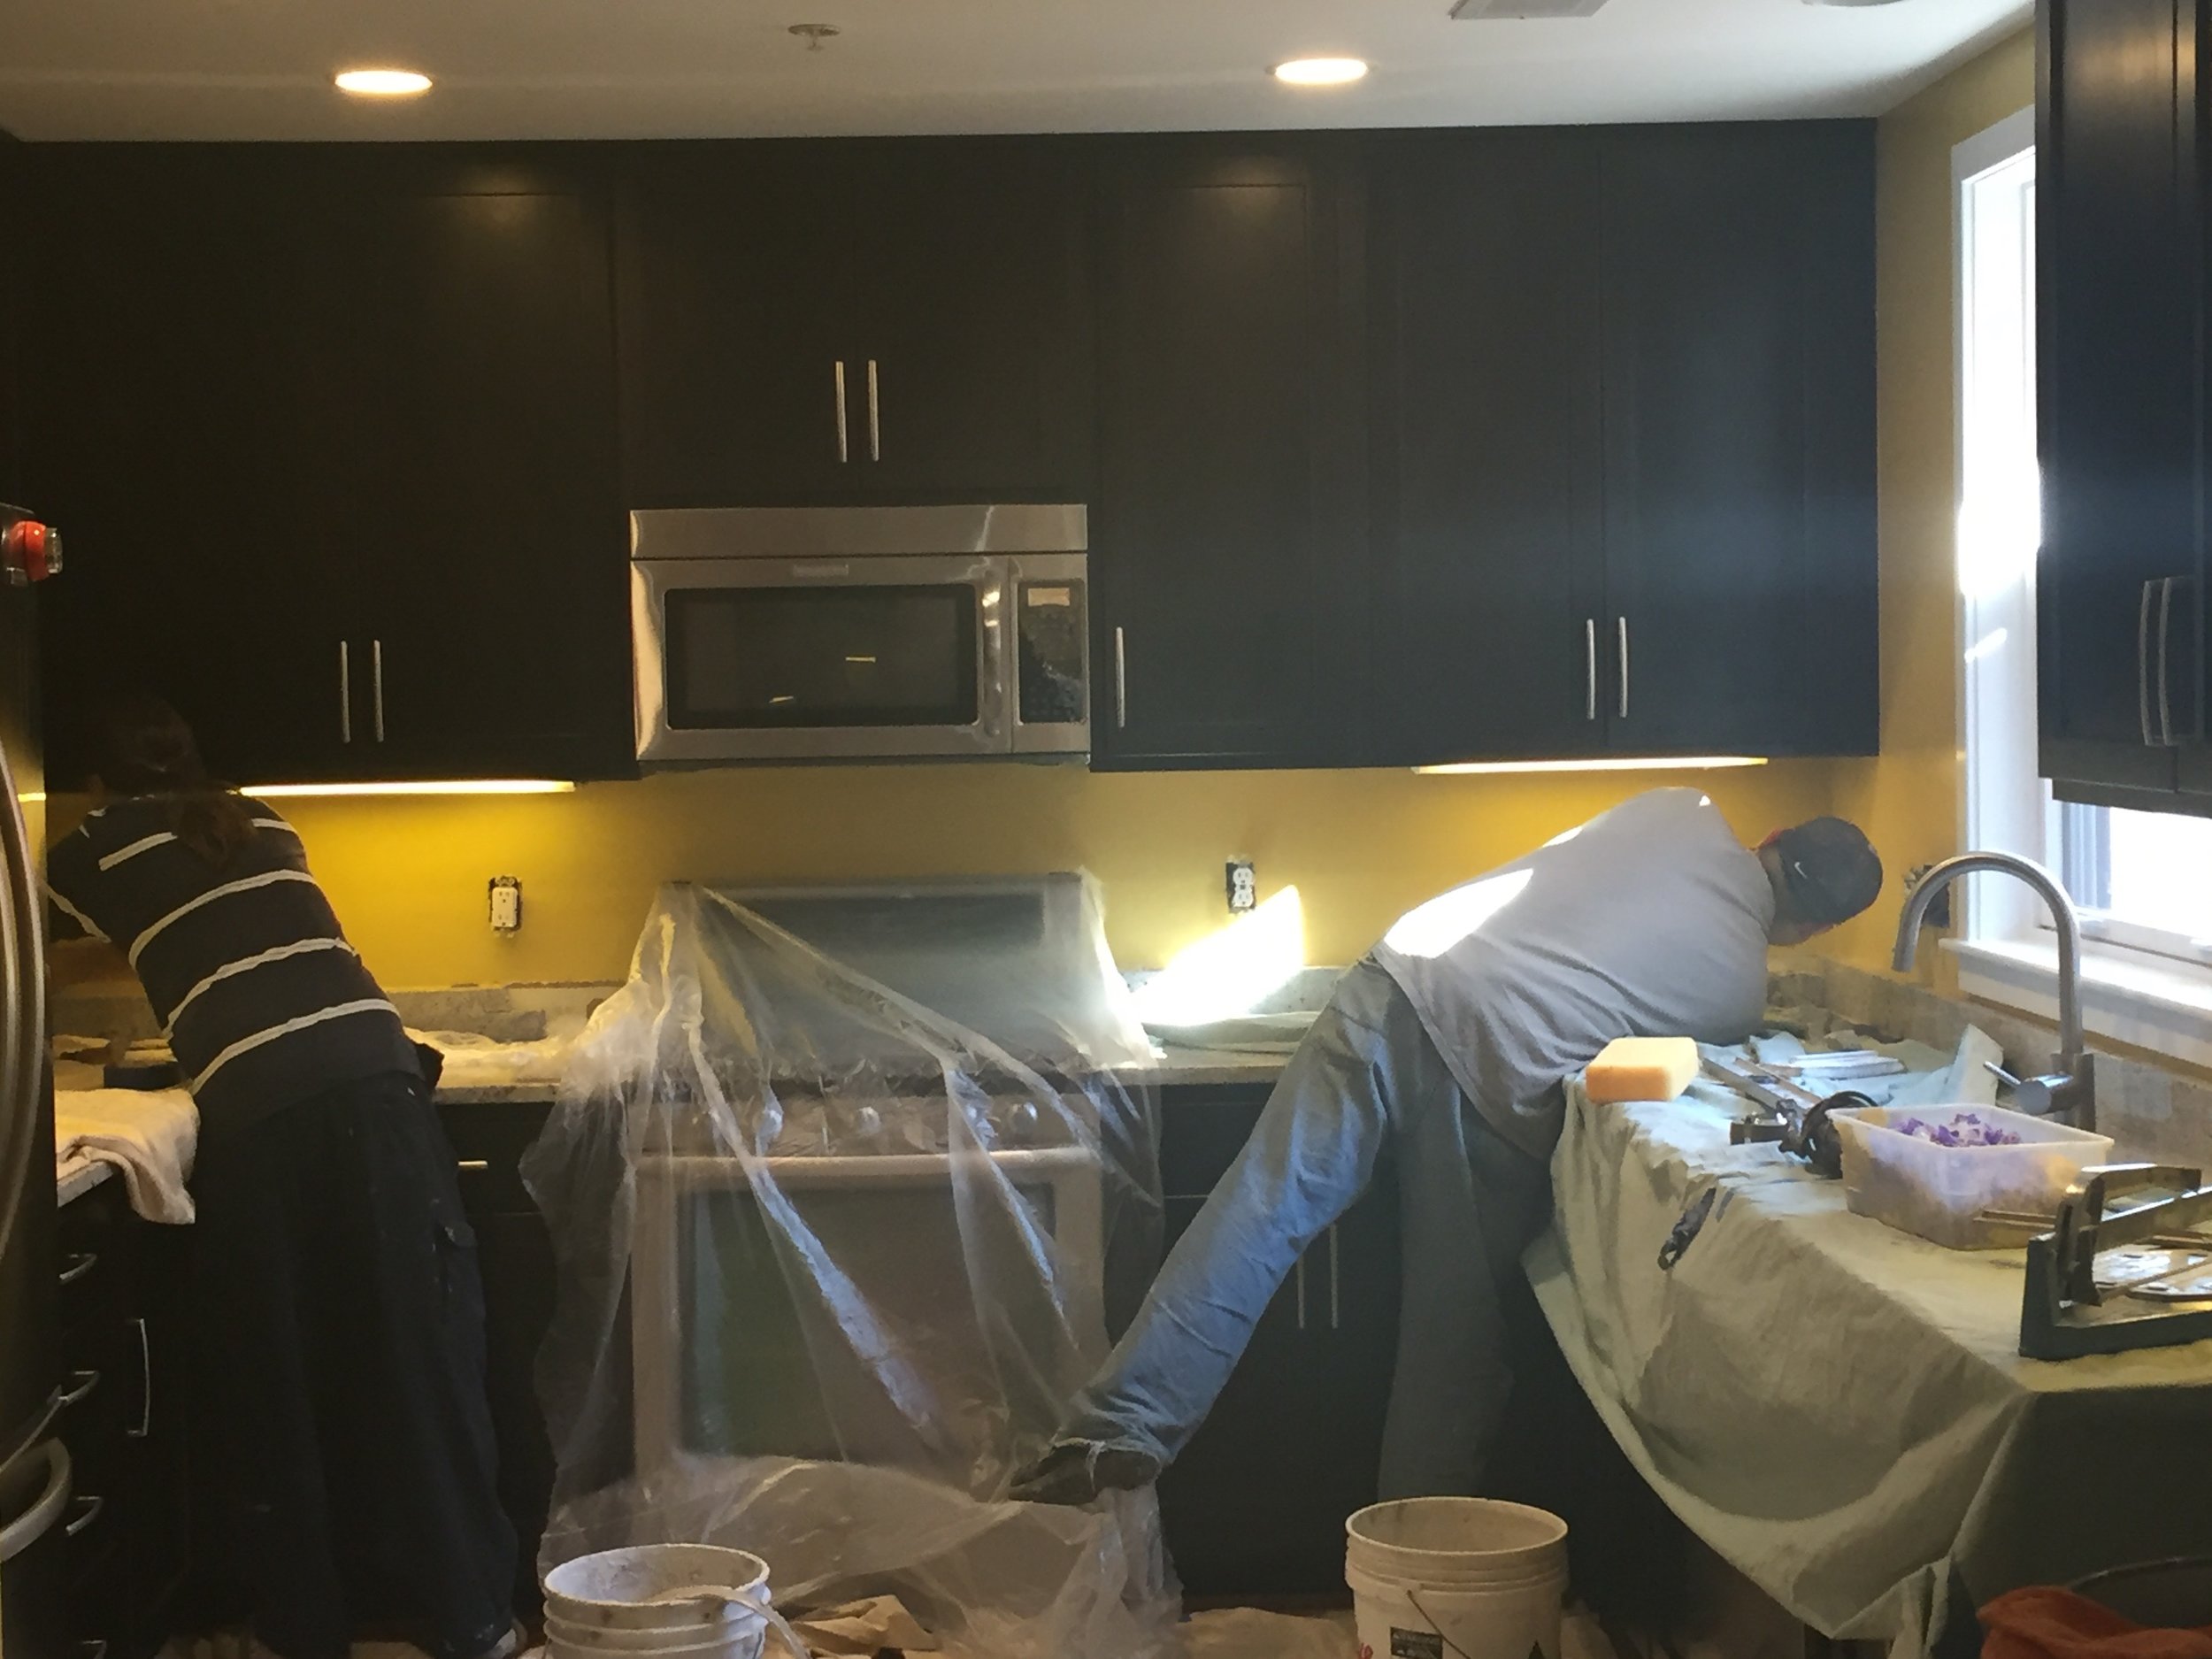
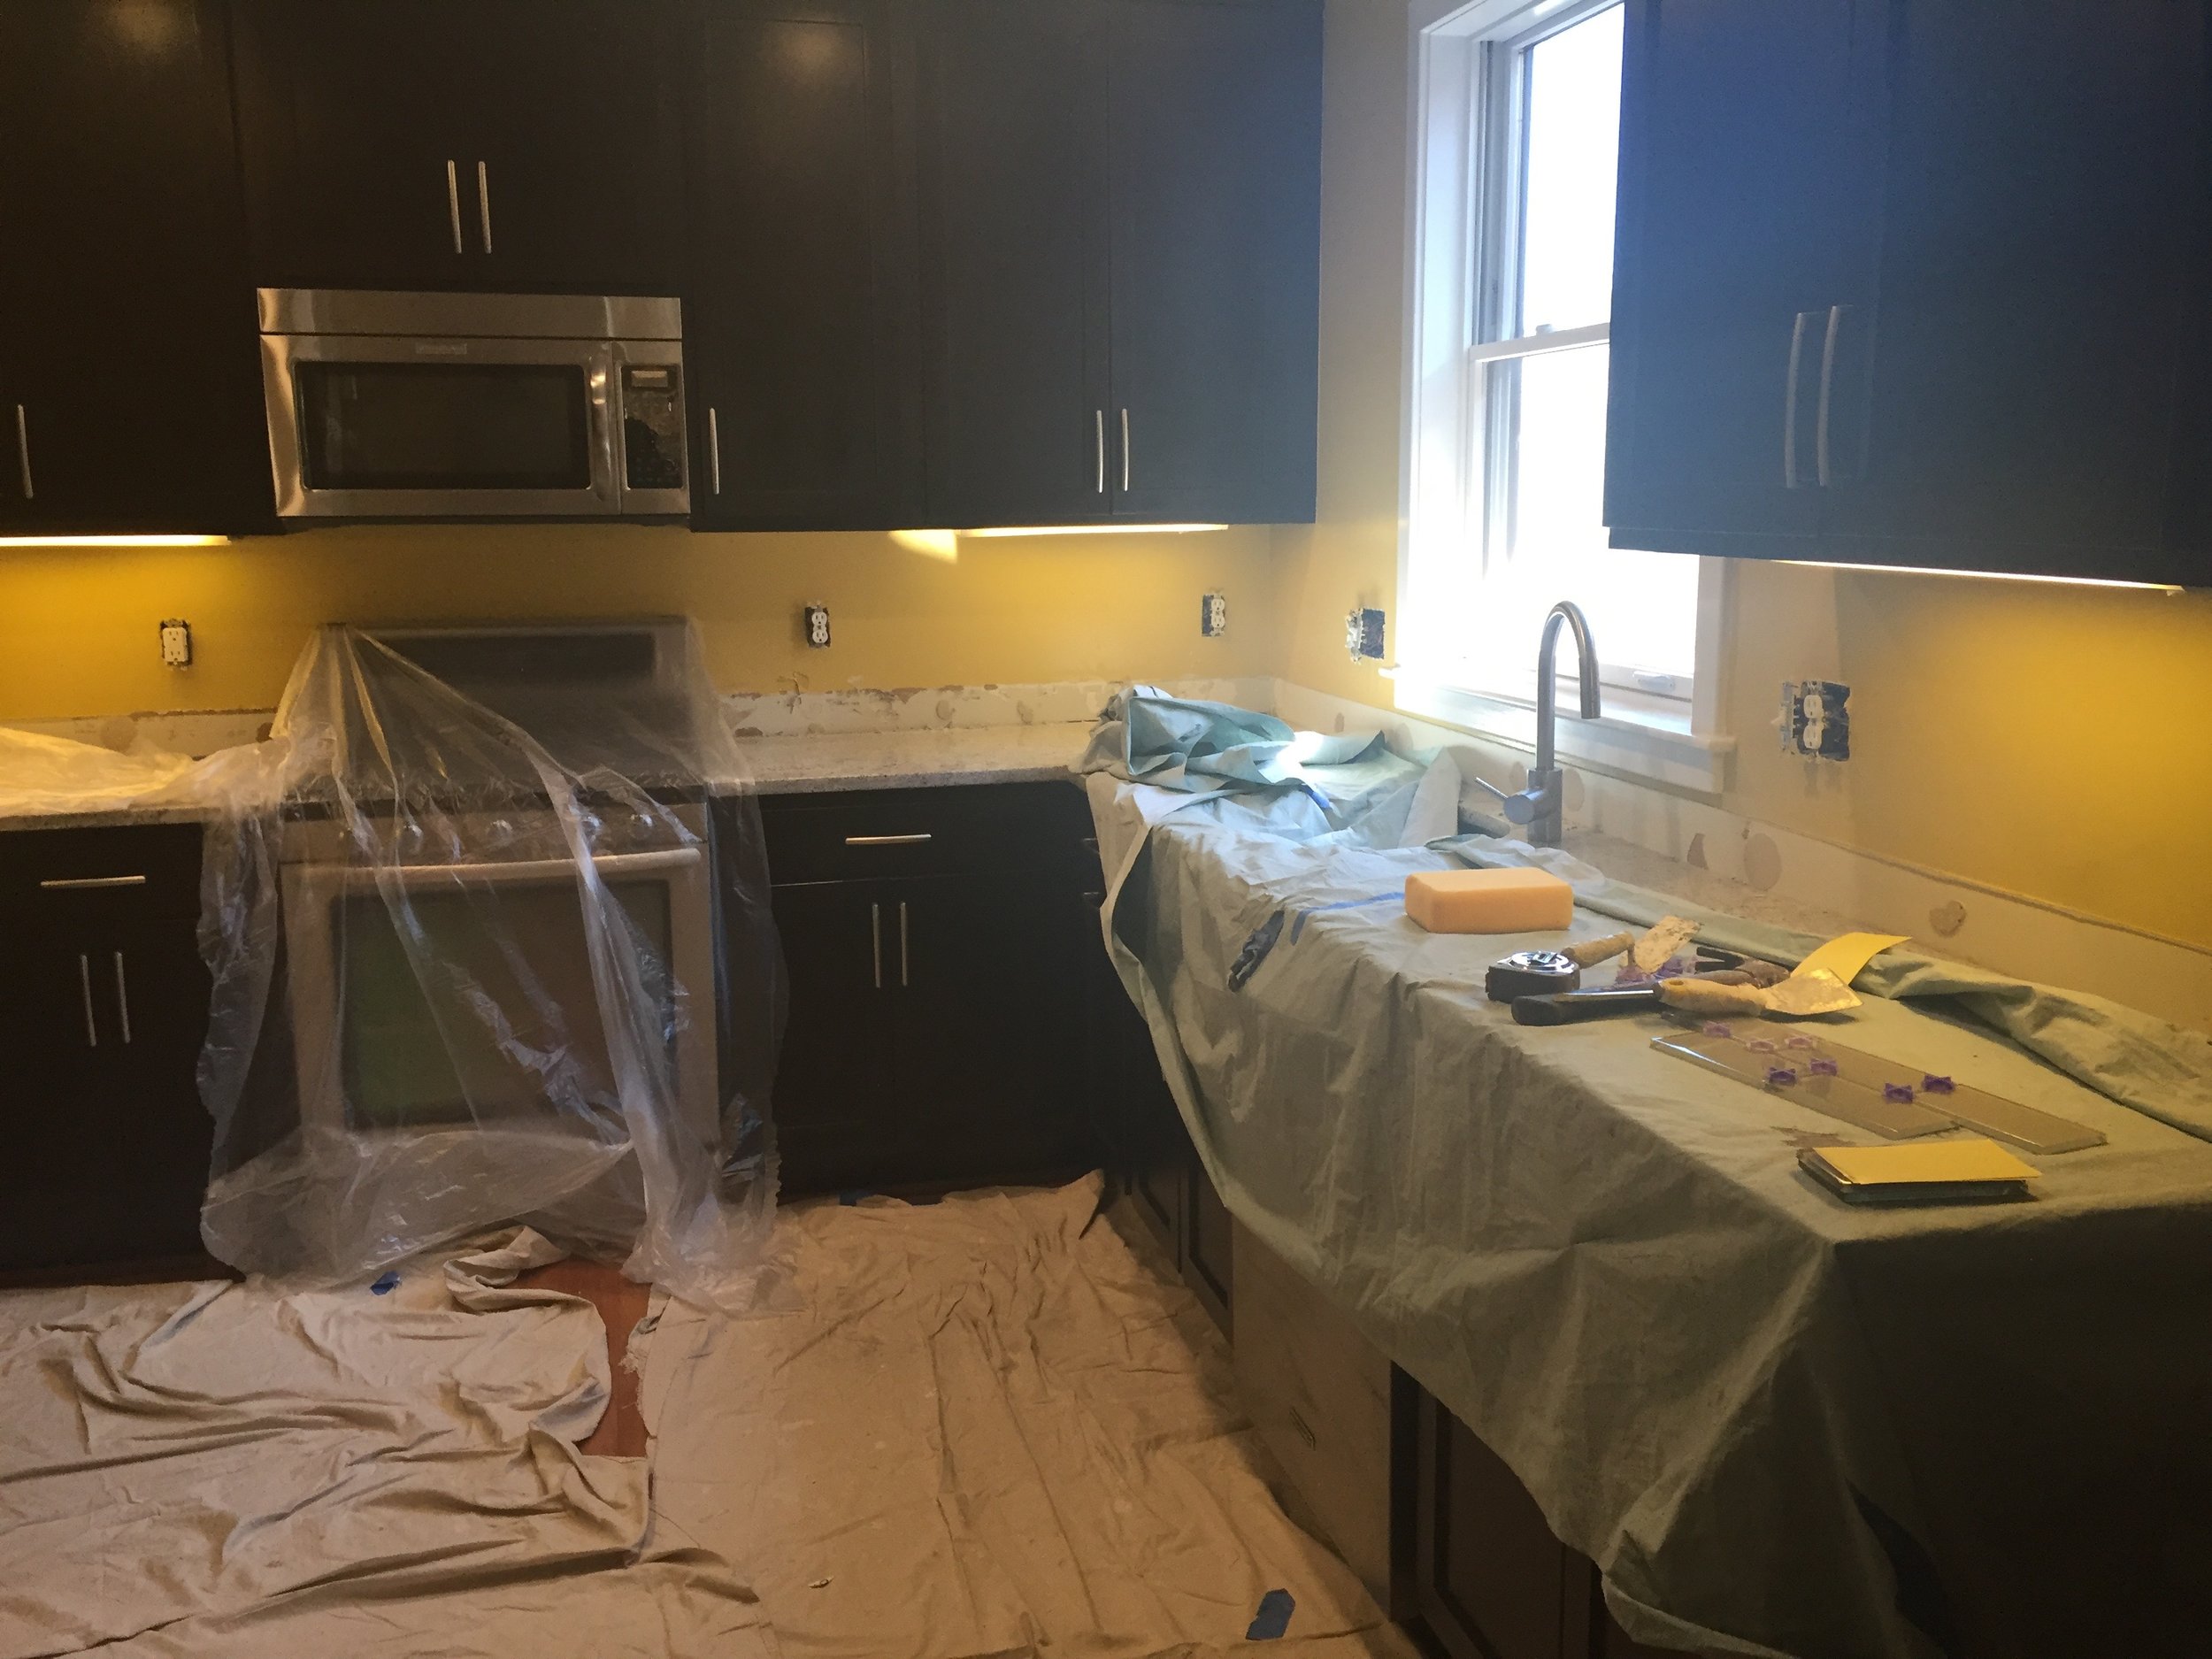
Having just invested in a home (with virgin granite countertops, mind you) and all the associated expenditures, I couldn't justify replacing them. I was, however, able to find a tile contractor who would attempt to remove the slab. Of course, that came with warnings that the countertop could be damaged or that there could be gaps between the countertop and wall that would make installation of the new backsplash more challenging (read: expensive). I decided to throw caution to the wind, immersed myself in thousands of tile options, and set the date.

Despite being a fully renovated property with new interior walls, etc., the two-person tile team ran into two hiccups:

  1. Most of the slabs of 4" granite would not budget with a crowbar from the wall. In the end, after more cautions from the crew about potential damage and my approval, the team took hammer and chisel to the pieces. It was loud and time-intensive, but I breathed a sigh of relief that my countertops were still intact.
  2. In one of the corners, despite new drywall, there were gaps that exceeded the depth of the glass tiles I had selected. Luckily a skim coat was able to correct that.


Demo and about 1/3 of the tiling was done in one day, and I had a brand new backsplash on day two! I've included a slideshow below of before, during and after above, and I'll leave you with a few takeaways from my experience if you are considering a similar kitchen project:

  1. Ask friends for contractor recommendations and/or consult a reference site online (but I put more weight on personal experiences). You also can consider visiting a reputable tile supply store (I found the one I purchased my tiles from had cards for those they recommended handy).
  2. Get at least two bids, having them visit and see the space. I have found many contractors send you a more detailed questionnaire and even ask for pictures.
  3. Take home tile samples - even ones that you think might not work. You'll have to consider not just color, but size, layout and finish. Even though I was limited to a range of whites and greys by my existing countertop, there were still lots of choices.
  4. If your contractor is not providing materials, confirm that you have everything you need - from the tiles (with extra in case some are broken or there are other mishaps), grout, edging, etc. And, when you pick up or receive those tiles, check every box! I did when I picked up and discovered that a few boxes were the wrong color (luckily before going home and the tile store delivered the remainder due to the mistake).

I'd love to hear about your home improvement experiences and tips, as well!